1. Access the NOQ Backend Portal
- Log in to the NOQ Backend Portal.
2. Navigate to Your Site
- Click on the Sites tab.
- Find your site in the list.
- Click Edit to access the site's settings.
- Select Stores then Split Arrangement

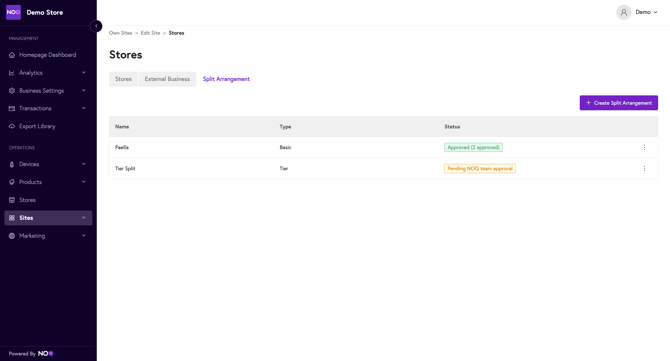
3. Select Stores > Split Arrangement
This will show all of your split arrangements. To view the menu for your editing abilities select the three dots on the right hand side.
- View Split Arrangement Details - This is an overview of the details, assigned stores and reset history.
- Edit Split Arrangement - This will redirect you to the page where you can make changes to your split arrangement that will be sent to NOQ admin for approval.
- Manage Stores - This will show you all stores assigned to the split and redirect you to the page to assign more stores.
- View Reset History - This will show your history of resets, automated and manual.
Please note: Any changes made will need to be verified by NOQ Admin. If this is an urgent change please contact NOQ support at your earliest convenience.

4. Resetting your split arrangement
Resetting your split arrangement means everything stays the same, however, your commission takings will start from Tier 1 again. Resetting your split arrangement is great for a venue with external vendors or a long-term pop-up where your commission might reset on a daily, weekly or monthly schedule.
- Select the three dots on the right-hand side, then 'Edit Split Arrangement'
- Select the 'Reset Split Arrangement' button on the top right-hand corner

- Once selecting 'Reset Split Arrangement' it will advise with this pop-up. To complete the reset you will need to select 'Yes, Reset Split', then 'Save'. Now this has been completed you will need to wait for a NOQ admin to approve your reset. On your split arrangement tab, this will show as 'Pending NOQ team approval' or 'Approved'.

5. Editing your split arrangement
- Amending your split type - You're able to adjust the name of the split, and the accounts and balance the split will be paid into.
Your Account ID and Balance ID can be found in Business Settings > Merchant ID's

- Amending your General Settings - You're able to amend your Merchant Service Charge allocation, Refund Fees allocation, VAT on commission, enable or disable the automatic reset, reset frequency and when.

6. Save your changes
- Once you've made all the changes to your split, at the top of the screen you will need to save these changes.

- Now this has been completed you will need to wait for a NOQ admin to approve your changes. On your split arrangement tab, this will show as 'Pending NOQ team approval' or 'Approved'.