Device Management Portal Guide
The 'Devices' section within the backend portal allows you to view, configure and reassign your terminals.
 Guide Contents
Page Overview:
Views

- POS Devices:
View all terminals linked to your business
View other device settings (Battery %, last Transaction, Sim Card status) - Other Devices: View all phones and tablets with NOQ apps installed.
- Activity History: Review change logs on your terminals and devices.
Search and Filter

- Search: Search by device name, model or ID.
- Filter: Filter devices by Store and Site allocation
Columns

- Customise the table view by adding or removing columns for a personalised view.
Actions
When a device is selected, the Actions menu provides several functions:

- Assign to Store: Select from a list of all Stores within your business. You can assign multiple devices to a single store at one time.
- Edit Active FSP: Choose from your created Functional Setting Profiles (FSPs) (see Profiles section for more details).
- Activate SIM Card
For terminals only - Deactivate SIM Card
For terminals only
Device Information

- Device Name: Assign a custom name to the device.
- Device ID: The unique identifier for the device (matches the S/N on the back of the terminal).
- Model: The specific model of the device.
- Battery: Displays the device’s battery life and current status. Please note this is updated when a transaction is processed on the device.
- EPOS FSP: Shows the active Functional Setting Profile for EPOS/Lite, with the ability to change this from a dropdown (see Profiles section).
- Merch FSP: Displays the current Functional Setting Profile for merchandising.
- Store: The store the device is assigned to.
- Site: The site the device is assigned to.
- Assignment: Shows the device’s assignment status (e.g., Boarded, Transferring, Unassigned).
- Last Activity: The most recent usage of the device.
- Last Card Transaction: The last card payment processed by the device.
- SIM Card: Toggle between On/Off.
- Software Version: The version of Adyen software installed on the device.
FAQs
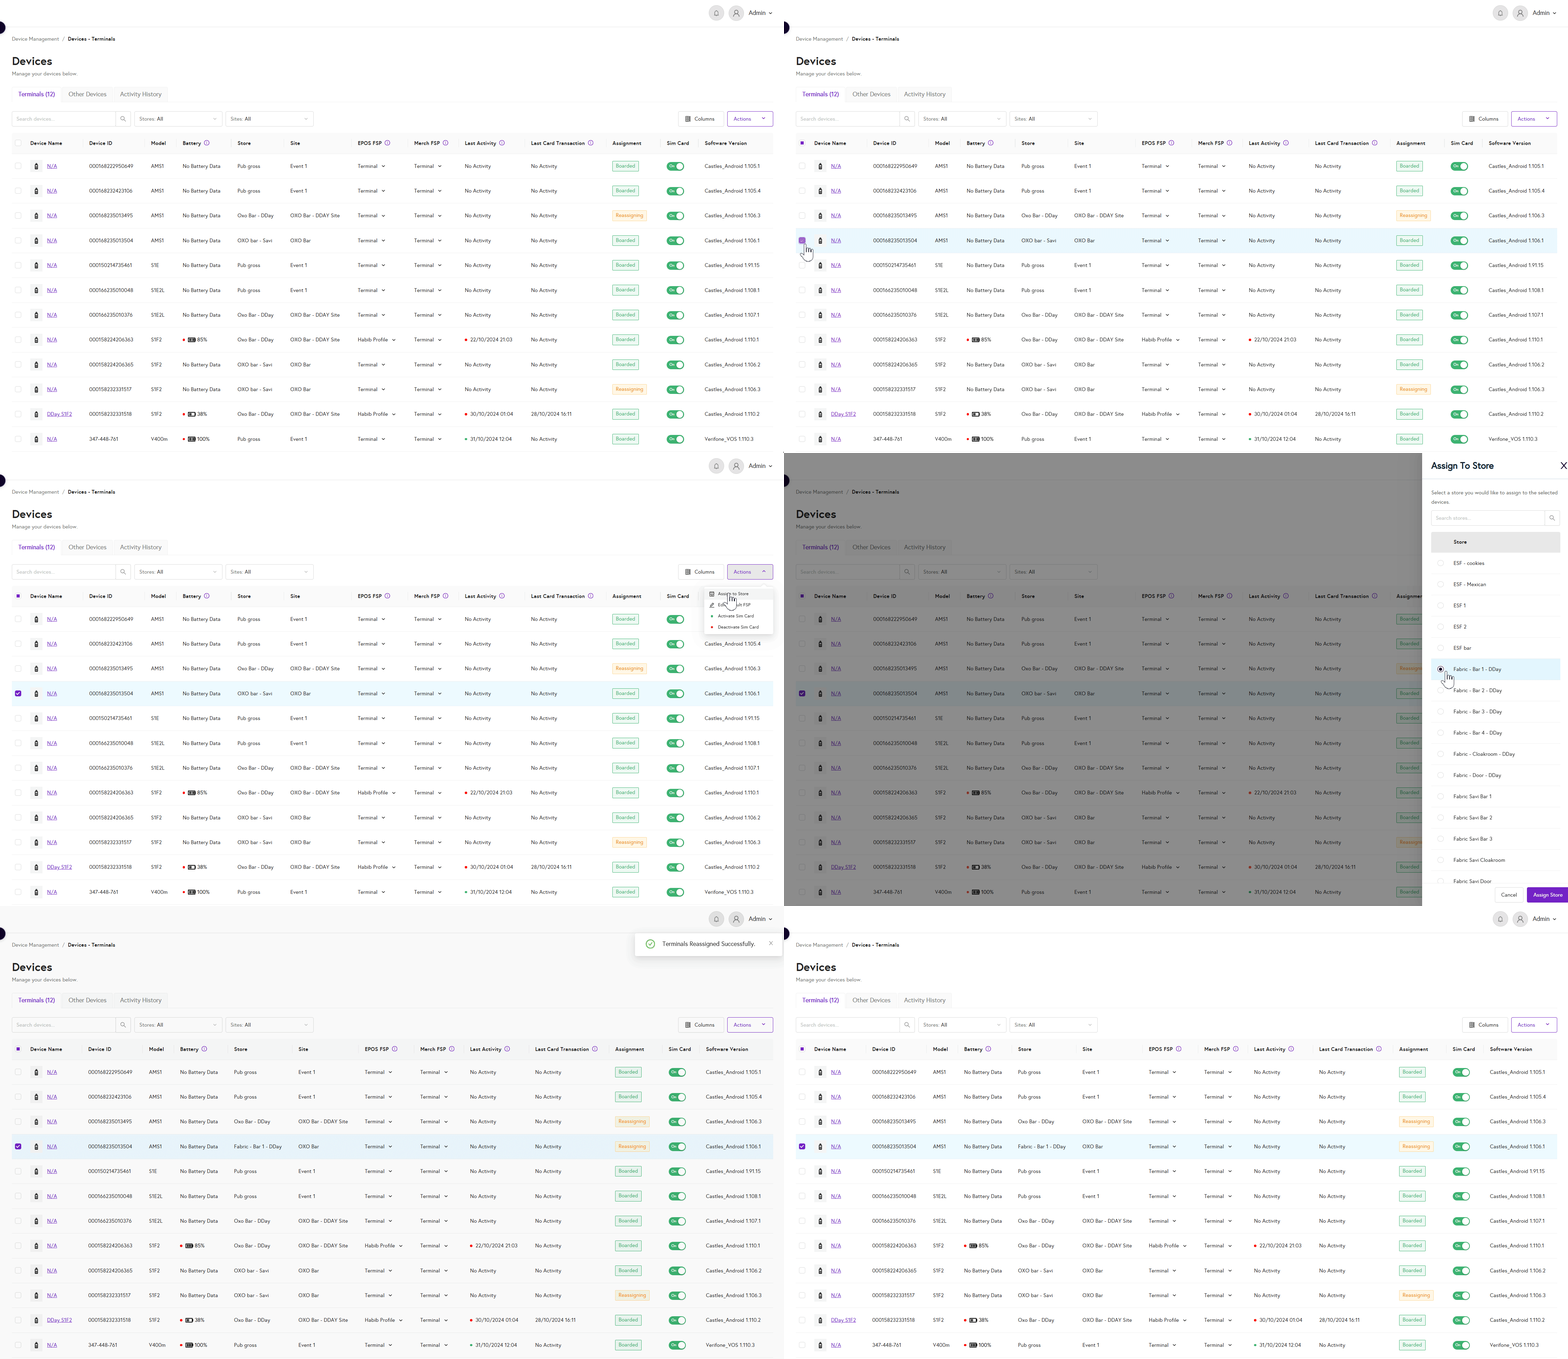
How to reassign a Terminal to a Store:

- Go to Device Management > Devices in the backend portal.
- Select the terminal(s) you want to assign to a store by ticking the box next to the device name.
- Click 'Actions' in the top menu.
- Choose 'Assign to Store' from the dropdown list.
- A list of all your stores will appear. Select the store you want to assign the terminal(s) to.
- Save the changes, and the terminal(s) will now be linked to that store
- Now on your terminal, press the circle button to close the EPOS app. A white updating box will appear. Let it finish its sequence.
- Open the EPOS app. It will present an error message declaring it is assigned to the wrong store. Simply press Log out and log back in as normal. You should be good to go!
How to assign Functional Settings Profiles to Specific Terminals:
- Go to Device Management > Devices.
- Find the device and use the dropdown in the EPOS or Merch FSP column to select your profile.
- You can also select multiple devices, then click 'Actions' > 'Edit Default FSP Profile' to configure several devices at once.
For more detailed steps on how to create a Functional Settings Profile (FSP), click here.
